How to live stream on Facebook through OBS? 2020
April 23, 2020 Live stream tutorial
April 23, 2020 Live stream tutorial
Facebook added Live Streams to their Facebook Pages. So if you own a page you can from now on start streaming on Facebook.
Facebook added Live Streams to their Facebook Pages. So if you own a page you can from now on start streaming on Facebook.
Process
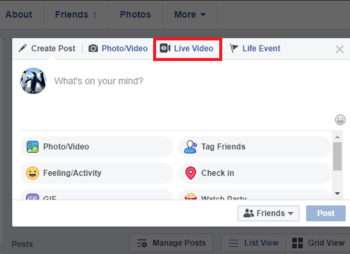
1. First enter personal status, click on ‘Live Video’in Create Post.
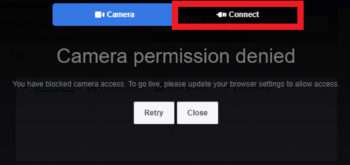
2. Select Connect
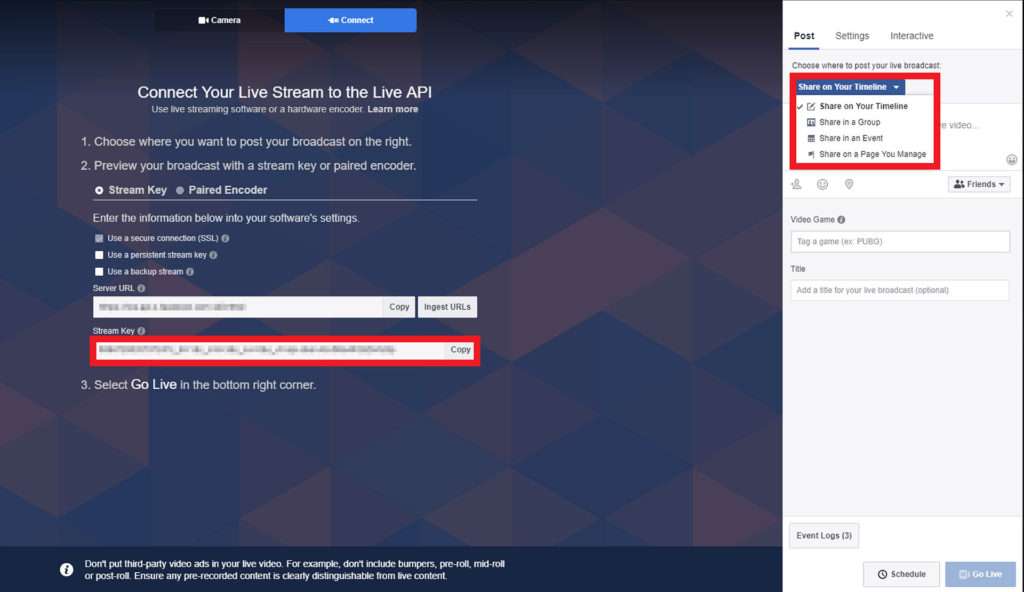
3. Copy the key below( Choose the “Use persistent stream key” if you do not want to change the key). You can choose where to post your live stream on the right corner.
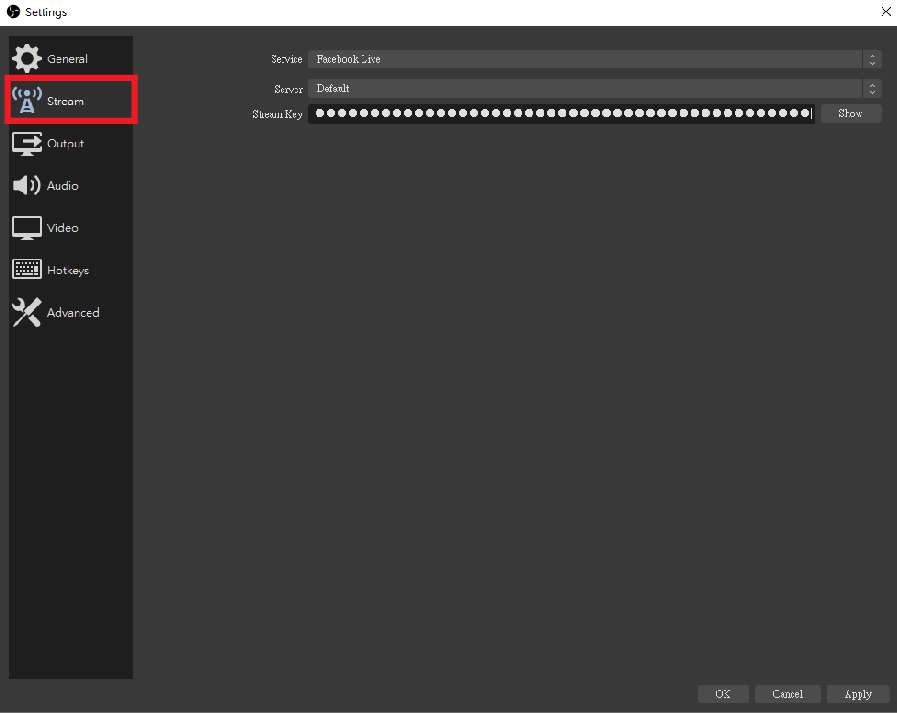
4. Open OBS and go to the lower right corner click on Settings->Stream, and paste the copied key.
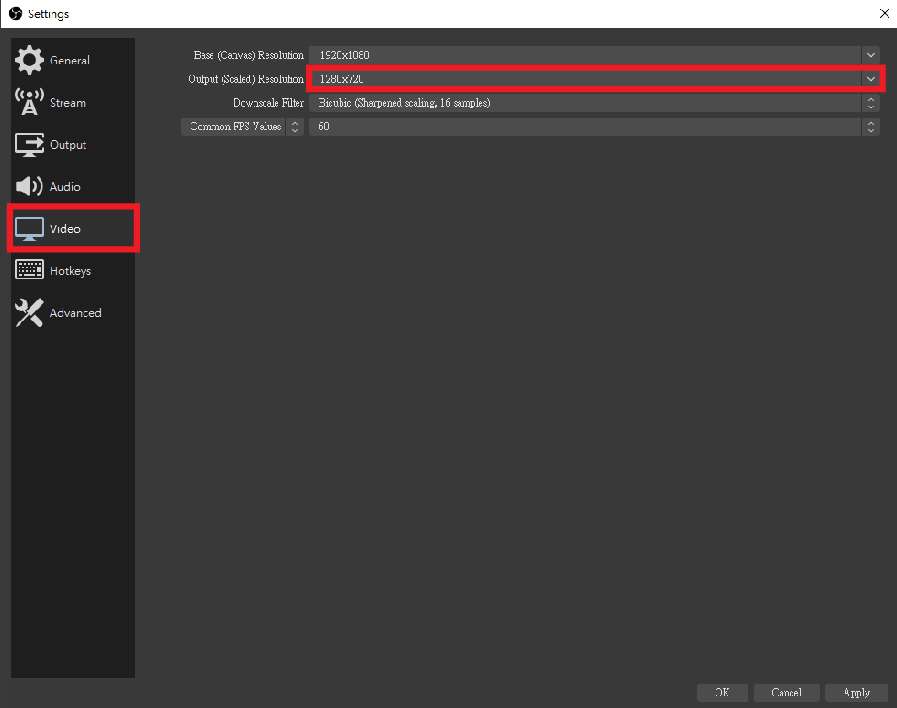
5. For the video output, adjust the output resolution to 1280×720 ( max supported by FB)
6. Return to OBS main screen and select ‘Start Streaming’
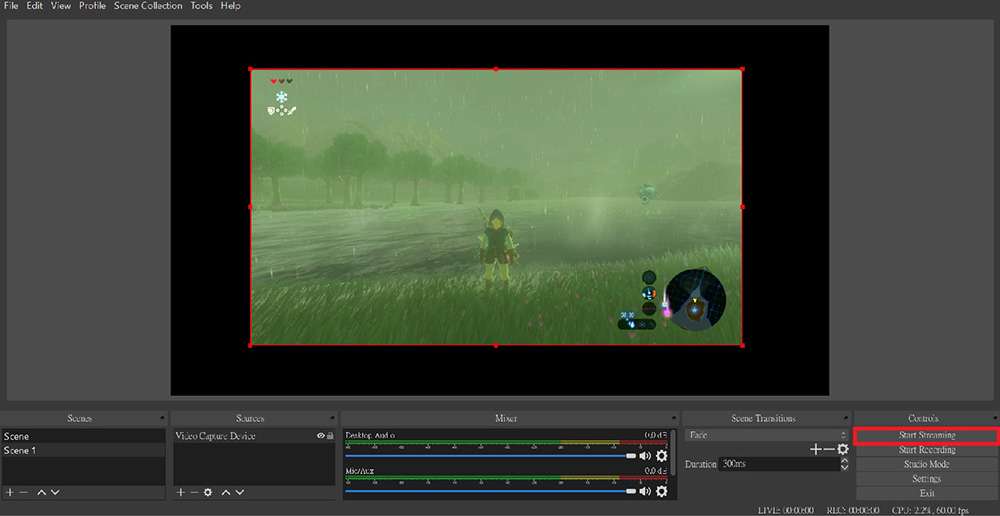
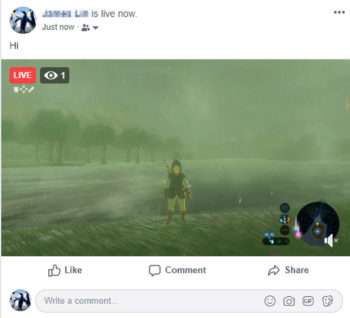
*This game is The Legend of Zelda: Breath of the Wild
*This game is The Legend of Zelda: Breath of the Wild
7. Preview screen will pop up after live stream successfully .Confirm that the settings are correct and select ‘go live’.
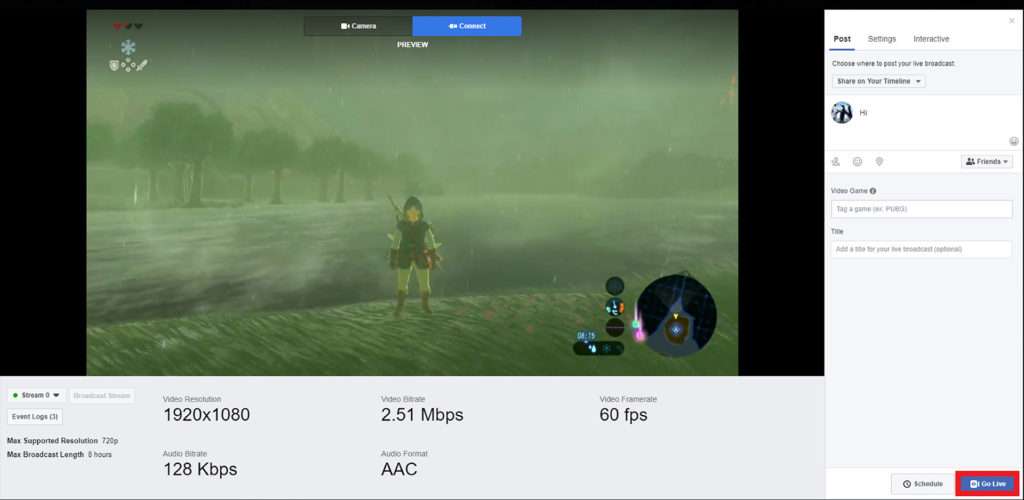
8. Start live stream!
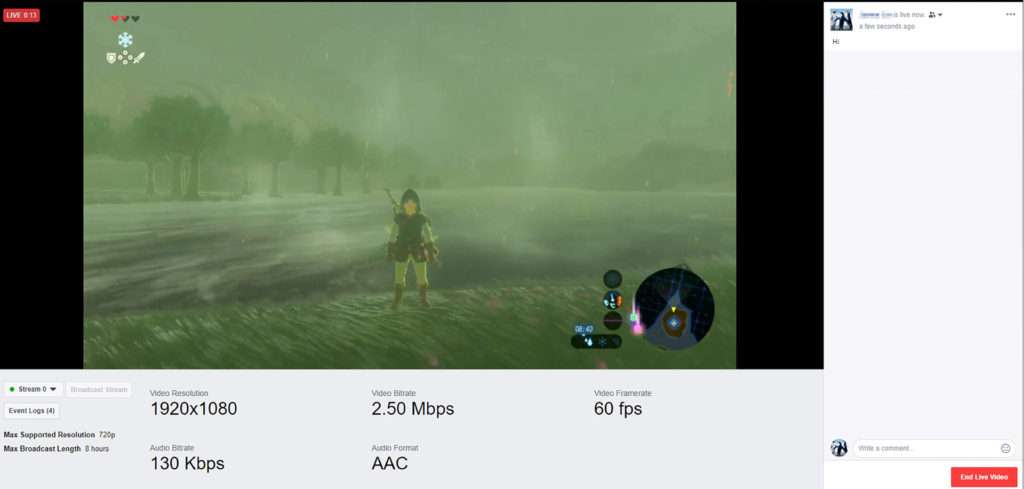
9. Return to personal page and see if live stream is successful.
